Joanna has a beautiful fireplace in her living room. We both loved the look of stacked firewood, so I bought a couple of reams of wood at a nursery (though they sell firewood everywhere - even Home Depot).
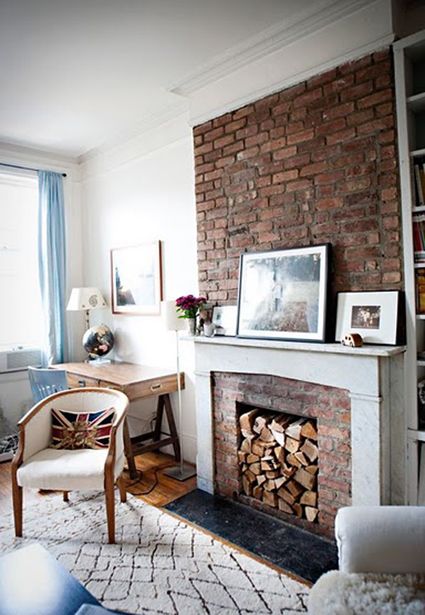

I had to cut a couple of inches off the length of some of the logs because the sides sloped in a little. I'm so happy with this look and think it's a great way to add an organic/rustic element to any room with a fireplace (especially of the non-working variety).

Another great feature in Joanna's living room is the wall of built-in bookshelves. All we did here was paint the shelf backs with Benjamin Moore's Horizon - one of my very favorite blue grays.

We whipped this project out in just a few minutes using this great little tool called a paint edger.


Joanna had this great little captain's mirror hanging in another room, but it just looked so perfect hung here on the shelving moulding. We tapped in a wall brad to hang the mirror, but 3M Picture Hanging Strips would also do the trick if you're worried about damaging the surface of your built-ins.

We liked the idea of creating sort of a reading nook in front of the bookshelves. I found this CRAZY heavy and huge vintage swing arm lamp at an antique shop, and thought the scale would be fun and could hold it's own in front of a wall of books.

I taped up the cord and the bulb inner workings and spray painted it a blue color from Sherwin Williams.

On the opposite side of the room, where you enter the living room, is also near the front door of the apartment. The space was perfect for this vintage brass bar cart, which is sort of dual purpose and acts as an entry console too.

I think every room needs a decent sized mirror to reflect light and brighten a space. The ceilings in this apartment are really high, so we needed a really long and narrow mirror to hang above the bar cart. I found this one for a couple dollars at a local thrift shop.

It looks better than new with a few coats of Benjamin Moore's Gentlemen's Gray (one of my very favorite moody colors).

A little tip for painting mirrors: I used to be really intense about taping off the mirror part before painting the frame. It would literally take me three times as long to tape off the mirror as it would to get the actual painting done! And then I would be so frustrated after pulling off the tape only to see the old finish reflecting underneath the edges of the frame. So now I don't tape anything - I just paint as much as is necessary to cover all the old finish so that it's not peeking out anywhere. I really dig my brush down under the edge of the frame and the paint usually gets all over the mirror, but I still leave it all to dry for a day or two. After the paint has cured, I spray the mirror down with windex and use a paper towel to clean up the mirror surface. It's like magic! The paint comes right off the mirror, but stays on the frame. Sometimes if I'm feeling ambitious, I'll run a razor blade around the borders of the frame to sort of perforate the paint before cleaning it up with the windex. Works like a charm!

Next up: the Nursery!
{Again, a HUGE thanks to Karen Mordechai for taking many of these photos above. Karen is a fabulously talented New York-based photographer. You should check out her portfolio, especially if you have a wedding coming up!}