My dear friend and former college roommate, Emily, and her family recently moved to a new home in a new city. It has been so fun working with her a little (online) on her house projects and seeing the transformation of her beautiful home.
I'm sure there will be more pictures of Emily's home in future posts, but here are some photos of her kitchen.
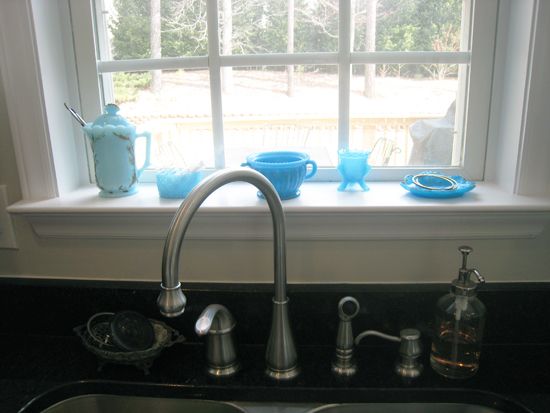
Emily uses her blue milk glass collection to store all those little things that seem to pile up at the kitchen sink. Oddly, our sinks attract the exact same items: kids medicine syringes, water color brushes and jewelry.
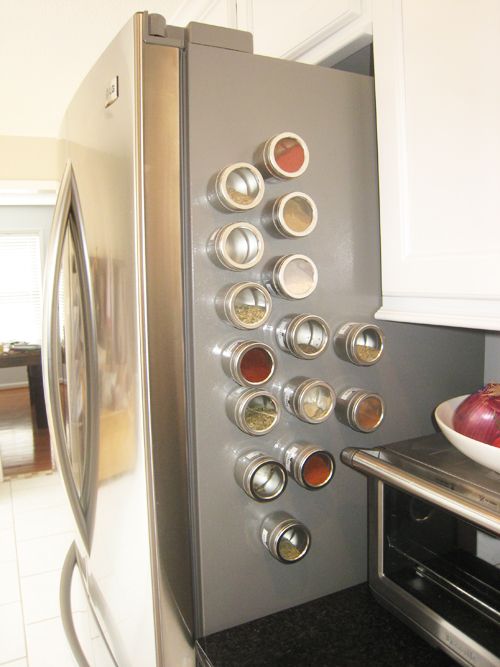
Using magnetic containers from Bed, Bath and Beyond, Emily stores her herbs and spices on the side of her fridge. She likes that they are mostly hidden and off the counters, but still very accessible.
Adorable DIY message board...

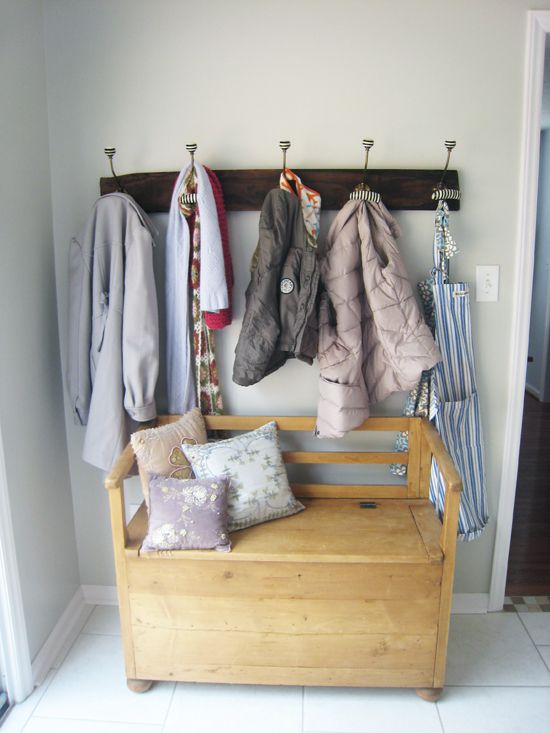
Are you jealous, like I am, of Emily's coat hooks and bench? She made the coat rack with an old piece of black walnut and hooks from Anthropolgie.
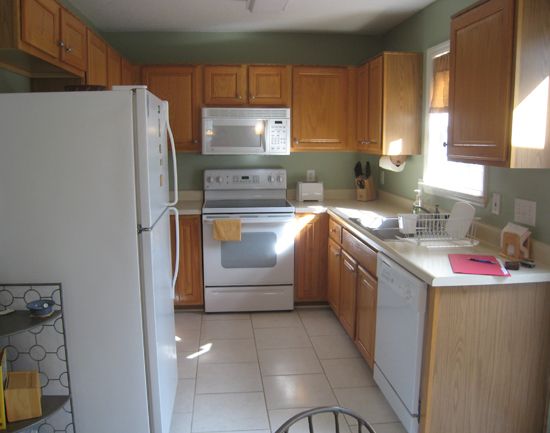
When Emily and her husband, Todd, purchased the house, the kitchen was pretty boring and outdated:
Here's the 'after' shot. They have plans to put in french doors (not pictured) and to add hardwood to match the rest of the floors in the house. But it looks great now doesn't it?
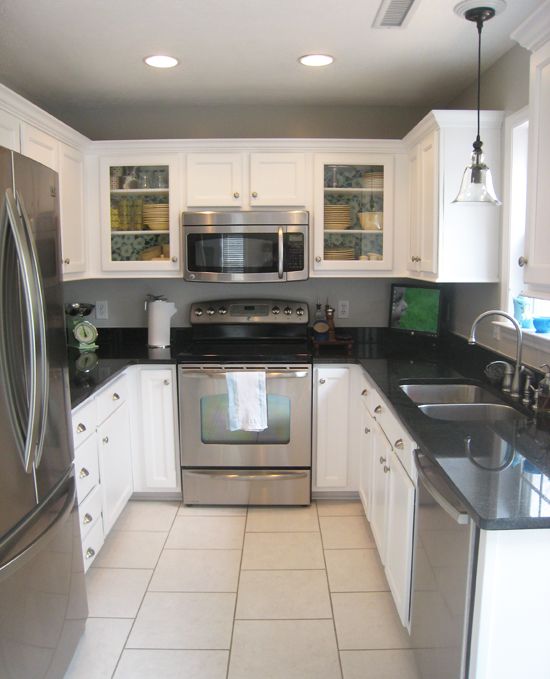
I think it's cool that Emily has a computer on her counter. She wrote out all her recipes and has them stored here (the tower is hidden behind the moulding on top of the cabinets).
NOW! For the project that inspired the post title. Emily wanted a little punch of color and pattern in the sea of her newly painted white cabinets. Since wallpaper can be so expensive, and since Emily has the same fabric-collecting disease that I have, we decided to put some of her pretty fabric to good use in the kitchen.
One of my favorite things about using fabric as wallpaper is that it's completely removable and does not damage your walls. Even the fabric comes out unscathed! It just needs a good washing to get all the starch out.
There are lots of tutorials online for how to hang fabric like wallpaper. Emily kindly wrote out her step-by-step here:
Materials:
- Liquid starch (we were able to find some at Walmart)
- Fabric (While lightweight fabrics are traditionally recommended, we used a home decor weight material and just used more starch. It worked great.)
- Clean sponge
- Large pan (cookie sheet works perfectly)
- Push pins
Process:
1. Prime the backs of the cabinets with Zinsser water-based primer.
2. Cut your fabric to fit, with a few inches of allowance on all sides.
3. Pour the liquid starch into a clean pan. Using a clean sponge, apply starch to the top half of the cabinet wall and work your way down.
4. Again, starting at the top and working down, smooth the fabric into place on top of the starched wall. Apply starch with the sponge on top of the placed fabric. The goal is for the fabric to be pretty well soaked in starch.
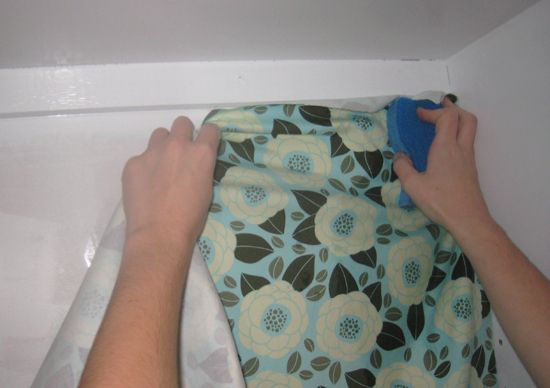
5. Use a few push pins to hold the fabric in place as you smooth. Keep sponging and smoothing. A credit card works great for the sides and corners where you want everything to be tight and secure.
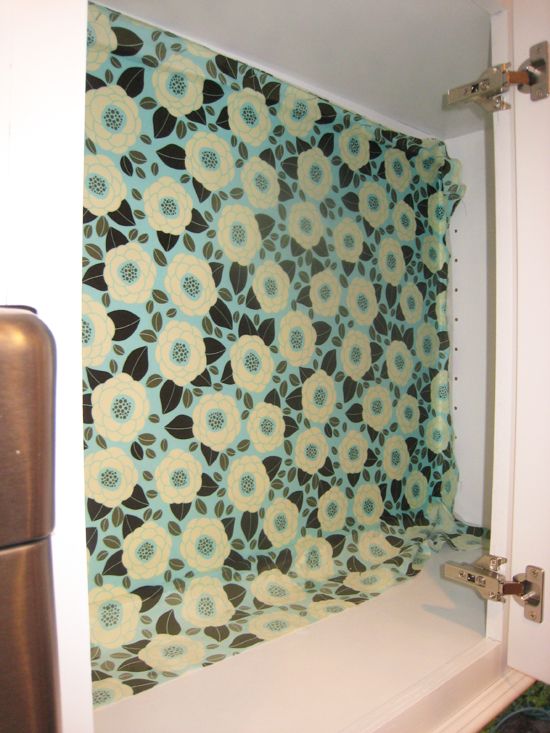
6. Let the starched fabric dry completely (overnight is usually long enough). The fabric will shrink as it dries, so be sure not to cut it when it's still wet. We recommend using a sewing rotary or a sharp razor/X-acto knife to cut the dried fabric, but be careful not to press too hard and score the cabinets!
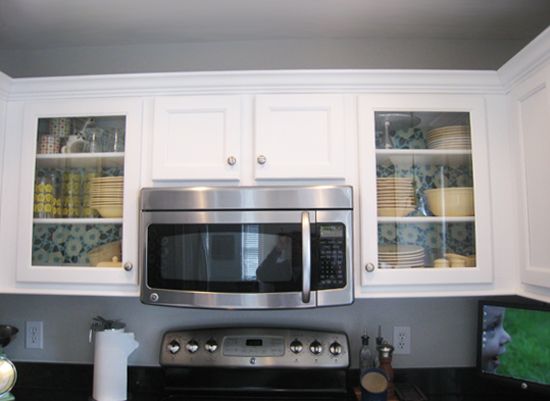
Great job, Todd and Emily! I love what a little color and pattern can do to any space!
Have a fun project that you'd like to share with LGN readers? Send your photos and submission to pearlstreetinteriors@gmail.com.