When I found this image from House Beautiful, I was inspired to look into getting mirror custom cut to fit a boxy and inexpensive dresser. That also turned out to be completely out of our price range (several hundred dollars for just the mirror for each dresser).

So, we were on to Plan C! I did a little googling and found some images of silver leafed furniture...


We both thought the silver leaf was a good alternative and decided to take the plunge. I found two bombay chests at HomeGoods that were on clearance for $75 because the paint was chipping. The size and shape were perfect for the room.

Once home, each dresser was lightly sanded over the chipped parts and then given a coat of chocolate brown paint (Ralph Lauren's 'Galvenized'). Once the paint had cured, I coated both dressers with 3-hour Quick Set Gilding Size, available here and at most art supply stores. I used about a pint between both dressers.

The gilding size acts as the glue that holds on the leaf. It's applied just like a varnish, and after waiting for a specified time, the size becomes tacky and is ready to be gilded.

There are many types of metal leaf. For this project, I used aluminum leaf because it was the brightest silver tone and looked the most to me like mirror (and the bonus is that aluminum is less expensive than silver leaf). A box of 500 5.5" x 5.5" sheets is $40-$50 and was more than enough for these two dressers.

As far as application of the leaf goes, the basic idea is to carefully lay the sheets down with as little folding of the leaf as possible. Then using a soft bristled paint brush, just tap, burnish and rub the leaf down. It gets really easy with practice - you'll feel like a pro after only 4 or 5 sheets.
Here are my best tips for gilding:
1. Do this project in the garage or outside if you are working on a large scale (like on furniture). The metal leaf bits get EVERYWHERE (which is a bonus if you are a four-year old obsessed with fairy dust)

2. Start with a flat, horizontal surface (like the dresser tops) to get the technique down before you attempt the vertical front or sides.
3. Once you've burnish one leaf sheet and are ready for the next, place that next sheet slightly on top of the already burnished leaf. By overlapping the sheets a little, there will be less of a gap/crack and the resulting look will be more seamless.
4. I ended up sort of liking the cracks and gaps in the gilding (it looks like antique mirror to me, with the chocolate brown base peeping through), but if you don't want to see the "imperfections" just use a bit of extra leaf and rub it into the gap or crack with your finger and the size will quickly pick up the leaf bits.

5. I was shocked at how resilient the gilded surface was after the size had fully dried. My client opted not to seal the finish because she wanted it to gently wear over time, but it would be easy to apply some Wipe On Poly to protect and seal the gilding.
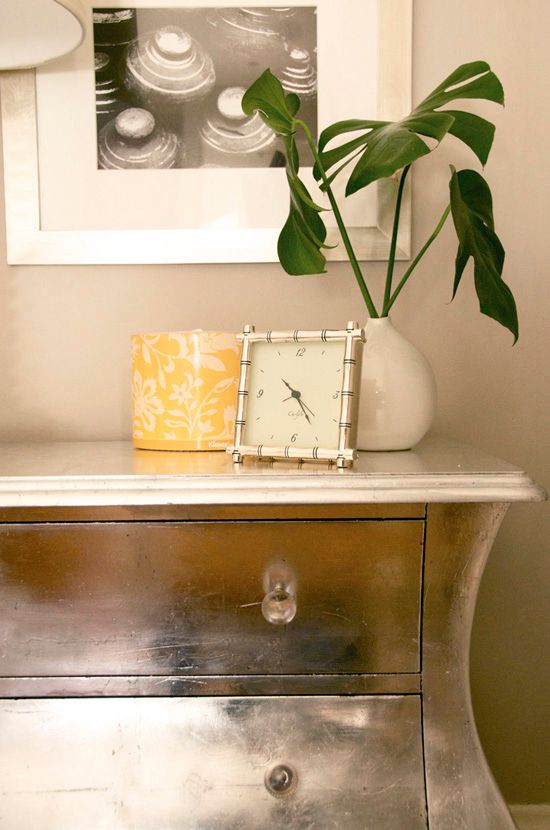
The process looks more intimidating than it really is. While it's sort of time consuming, I was able to catch up on my tivo-ed shows while I gilded (do you spy my remote?).

We used vintage lucite knobs from eBay as a final touch and I think that really moved these formally "Olde World" Homegoods dressers in the "Glam and Gorgeous" category.